
3D Max: Unwrap modifier
Unwrap is a really under used tool that can make mapping easier and tidier. This tutorial isn't intended to be an advanced mapping tutorial, more of an introduction to this modifier for you to expand upon. I'll be mapping a simple box just to make things clearer to see, but you can use this on any type of mesh object. If you have any problems please feel free to contact me.
I'm using 3D max 6 and will be assuming you know how to apply textures.
1. Select the object with your texture on and apply an Unwrap modifier > Modifiers - UV coordinates - Unwrap UVW or from the drop down modifier list.
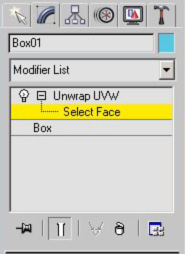
2. Double click on the Unwrap modifier in your stack (see image below) to go into sub-object mode, it will turn yellow to indicate this. The reason for doing this is to make it clearer working between the view port and the work window, as you can see how the faces correspond to each other. It doesn't matter at what point you do this step this is just my personal preference.
3. Just before I go onto the mapping, I'll explain generally the options on the initial menu.
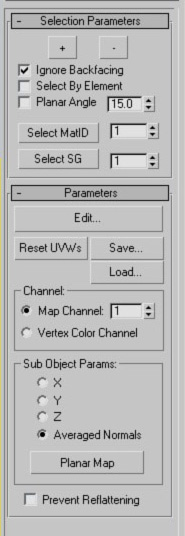 Ignore
Backfacing: When selecting faces either by dragging in the view port
or individually, with this ticked it will as it says ignore the back faces and
allow you to just select the front.
Ignore
Backfacing: When selecting faces either by dragging in the view port
or individually, with this ticked it will as it says ignore the back faces and
allow you to just select the front.
Select By Element: When you model an object you may of attached separate objects to it, these are refereed to as elements, tic this box to just work on mapping each element.
Planar Angle: Change the center mapping angle of the whole object.
Select MatID: You create map channels through edit mesh/poly/patch, this lets you select just those areas.
Select SG: Similar to MatID above but applies to faces of an object that's you've grouped.
Edit: Opens the mapping window, I will expand on this from point 4 onward.
Reset UVWs: Self explanatory, change all mapping back to what it was at the start.
Save: Self explanatory to some extend, you can save your coordinates as a file to transfer to another object, though it needs to have to same amount of faces as the object you're saving from. The other way of doing this if the object is in the same scene, is to copy and paste the Unwrap modifier just by right clicking on the name in the stack. * This applies to all modifiers.
Load: Self explanatory load the file you've saved.
Map Channel: Used to choose the channel of a multi map.
Vertex Color Channel: This is like a multi map but blends images together rather than have them separate. You would of set this up in the material editor.
Sub Object Params: With a face(s) selected you can change the center mapping angle.
Prevent Reflattening: Effectively a lock button.
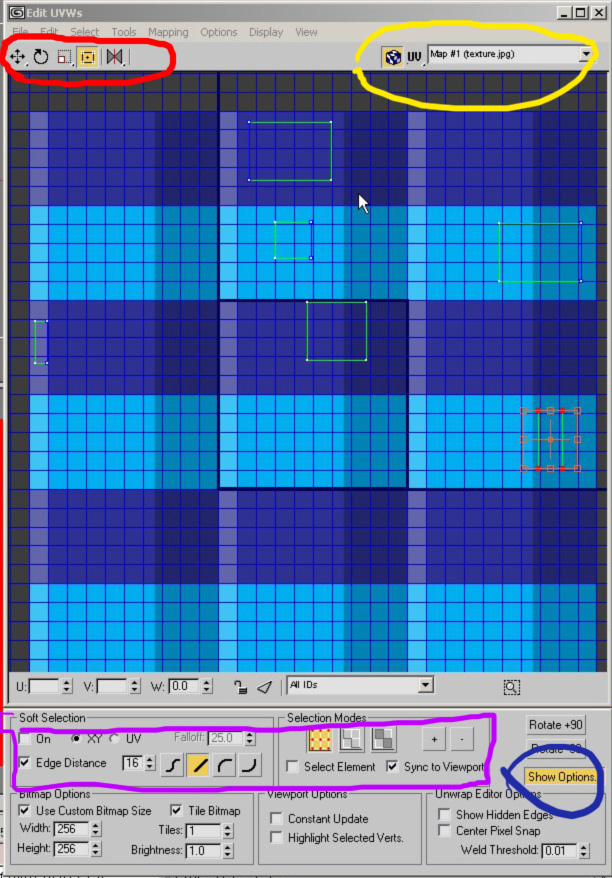
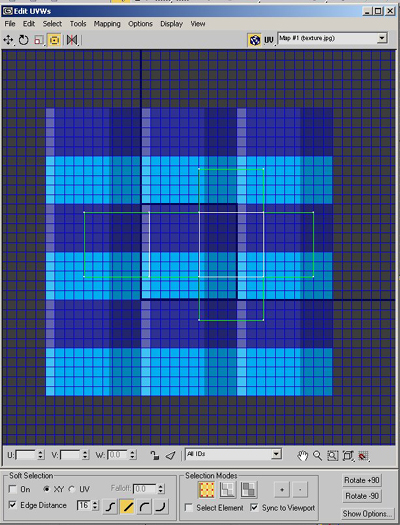
4. Press the Edit button which will open a new window, this is where you map your texture. (see image below)
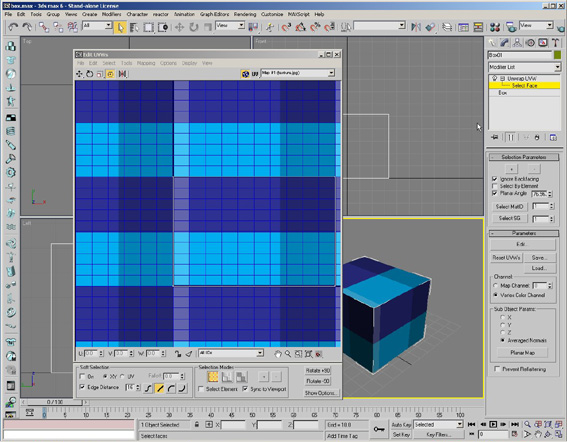
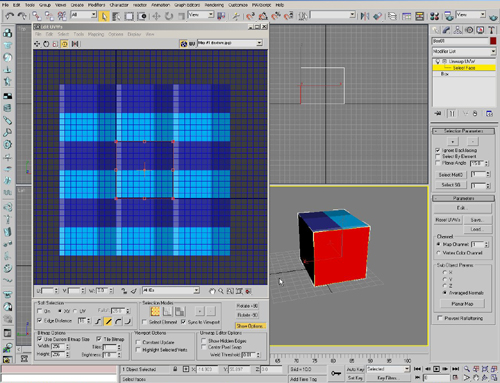
5. Working between object and the edit window. You can select faces in sub-object mode they will be highlight in red (image below left) then in the edit window go to Mapping - Flatten Mapping (more from point 7 below) to separate that face from the mesh and to be able to map it separately. Exit sub object to be able to see what you're mapping as this will get rid of the red highlight.
5. In the edit menu you move around by scowling the middle mouse button to zoom and press down for the hand tool. Then left click to select.
- By using the tools circled in red in the picture below you can (from left) move, rotate, scale, free transform and mirror. The buttons that have a small triangle in the bottom corner indicates additional tools if you left click and hold. These are variations of the tools just listed.
- The button circled in blue is show options, this extends the menu and has additional options for viewing the map. The brightness setting and tiles are very useful, the rest are self explanatory.
- The buttons circled in yellow are show map, which shows the map in the view port or not. Then the drop down menu is a list of the maps that you can switch between if you are mapping a multi map object.
- The buttons circled in purple are advance mapping tools with soft selection etc. If you've used these on UVW modifiers then they're the same.
- The rest of the buttons are self explanatory.
7. Their are several ways to flatten the faces to map them which is dependent on the object shape, how many faces it has and your map. To give you a general idea of what each one does;
A) Mapping- Flatten Mapping - Select singular or groups of faces and flatten them, when you do this a menu comes up as it does for all flatten options. (image below)
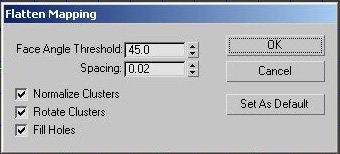
Face Angle Threshold - This works like a bit like cut off in the view point, the higher the number the less faces are shown. I've never had the need to change this from default.
Spacing - The higher the number the more spacing around the separated faces on flattening, this is at the expense of the faces getting smaller the higher the number. Default I've found works fine.
Normalize Clusters - Rotate Clusters - Fill Holes - With these ticked it will keep all the separated faces within the square, the right way up and not fragmented.
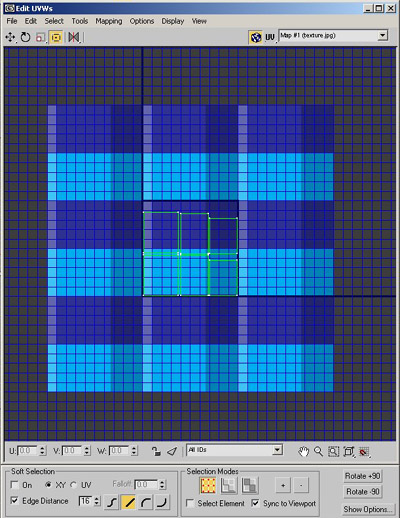
In the picture below I selected the whole object and flattened, which you will see separates each face so I can map them individually from one another.
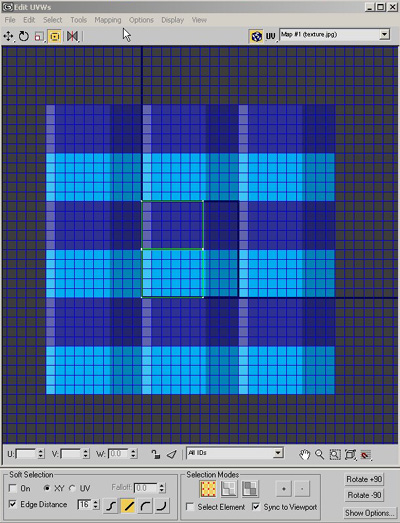
B) Mapping- Normal Mapping - When you do this a menu will come up asking how you want to flatten, the choices are:
Back/Front Mapping - (this is the example below) This cuts your mesh in half, both half's being the back and front according to the viewpoint.
Left/Right Mapping - Just like Back/Front Mapping but Left/Right according to the viewpoint.
Top/Bottom Mapping - Just like Back/Front Mapping. but for Top/Bottom according to the viewpoint.
Box No Top Mapping - Self explanatory to some extent, flattens the sides of the object but not the top.
Box Mapping - Specifically for box shapes and it flatten all sides of the box.
Diamond Mapping - This is many used on sphere shaped objects and will split the shape in half and then in quarters.
C) Mapping- Unfold Mapping - A menu will come up asking how you want to walk the faces, this refers to how the faces will be displayed. This can be a little unpredictable on high polygon objects and I wouldn't suggest using this setting on them. For simple objects it works well as you'll see below.
8. The second aspect is using the UVW modifier along side Unwrap. With this technique you can refine your mapping coordinates.
As you will see from the example below the object already has mapping coordinates given by the UVW Map, by adding an Unwrap modifier I can tweak the coordinates in the same way as I have above. i.e. selecting faces/areas to map.
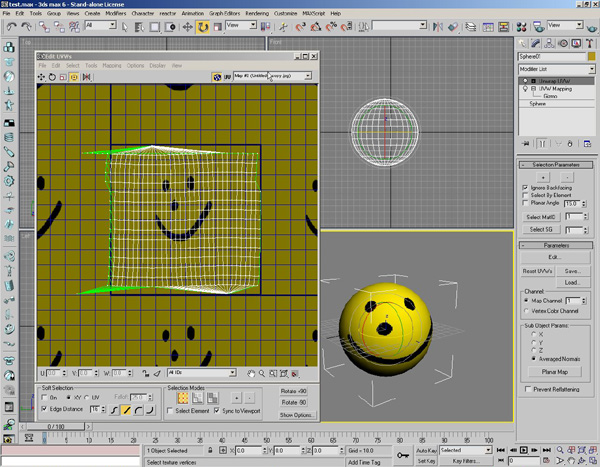
* For example I can move the eyes and not the rest of the map. So this is a good technique to use if your texture is out of place.

9. As all UVW modifiers and mapping techniques are all dependent on the texture you create, these are a few helpers that I've come across:
 Textporter unwraps your mesh and saves it as a image file. The link is to Cuneyt
Ozdas website that hosts texporter.
Textporter unwraps your mesh and saves it as a image file. The link is to Cuneyt
Ozdas website that hosts texporter.
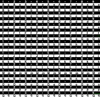 Test
map, apply as a texture and be able to correspond the grid numbers to the
texture your creating. I'm unable to find the website to give credit for this,
so if any one knows please get in touch.
Test
map, apply as a texture and be able to correspond the grid numbers to the
texture your creating. I'm unable to find the website to give credit for this,
so if any one knows please get in touch.
Also you can use unwrap to unfold your geometry so you can render stills to draw over or create abstract shapes. Autodesk has a tutorial on it which is the best I've seen.